Welcome to my blog. I was inspired by the book, "Blogging for Bliss" by Tara Frey.

Welcome to my blog. I was inspired by the book, "Blogging for Bliss" by Tara Frey. My goal is to share a little about my life, and a lot about my longarm quilting business, Lone Tree Designs.

Wednesday, October 31, 2018

Why do We Quilt?

 Have you ever wondered why we quilt?  What exactly is the attraction to this hobby (some might even call it an obsession) of ours?  And, what keeps us coming back?
  I've thought about this a lot over the years.  I started quilting in the early 90's.  My initial motivation was to make a connection with my mom.  She was taking a quilting class and invited me to come with her.  We hadn't done anything fun together in awhile.  I had a young son, and needed to get away, so I signed up.  Once I got a taste of the sisterhood...I was hooked!  There is something so inexplicable about the sisterhood of quilters!  It is like nothing I have ever experienced.  I didn't have a sister growing up, but I can imagine that it might have been something like what I feel for my group of quilting friends.  We laugh together. We share our moments of joy and our moments of sorrow together.  What happens at retreat, stays at retreat!  It's a sorority of sorts. 
I would imagine that most of you began your quilting journey with a grandmother, a mom, or a friend.  If not, I would bet that you quickly found a sisterhood among those that you sat next to in your very first quilting class, and you've never looked back.
  Another reason that we quilt has to be the sheer joy of creating.  I believe that we were created to enjoy beauty.  Look at the world around us.  There is an explosion of color and creativity all around us.  The flowers, the trees, the skies, the seas...it's all there for us to marvel at its beauty.  We admire it and desire to create beauty ourselves.  There are many ways to do that.  Whether it is through painting, drawing, cooking, gardening, writing, sewing, decorating, photography, or any number of other activities, we can add beauty to our lives.  Many of us enjoy several of these creative pursuits. 
 For me, over the course of my life, I have done painting on fabric, macrame, leather work, crochet, scrapbooking, colored pencil drawing, photography, home decorating, sewing clothing, scrapbooking, gardening, counted crossed stitch, embroidery, and finally quilting.  I say "finally" because, in quilting, I have found my passion.  There is nothing I enjoy more than the creative process of choosing a pattern, finding fabrics in colors and patterns that are pleasing to my eye, cutting and sewing as precisely as I can, and then quilting on my longarm a beautiful project. (notice I did not mention binding!)
  Finally,  I think a reason that we quilt is an innate desire to leave something behind.  To give to others something that is a part of us and will possibly last longer than we will is such a special thing.  I make quilts for my loved ones hoping that one day, when I am no longer here, they will wrap themselves in that quilt and remember how much I loved and cared for them.  My hope is that the pews at my funeral will be covered with quilts, and that everyone who wants one to remember me will take one home.  That is a legacy that is something I can feel good about.


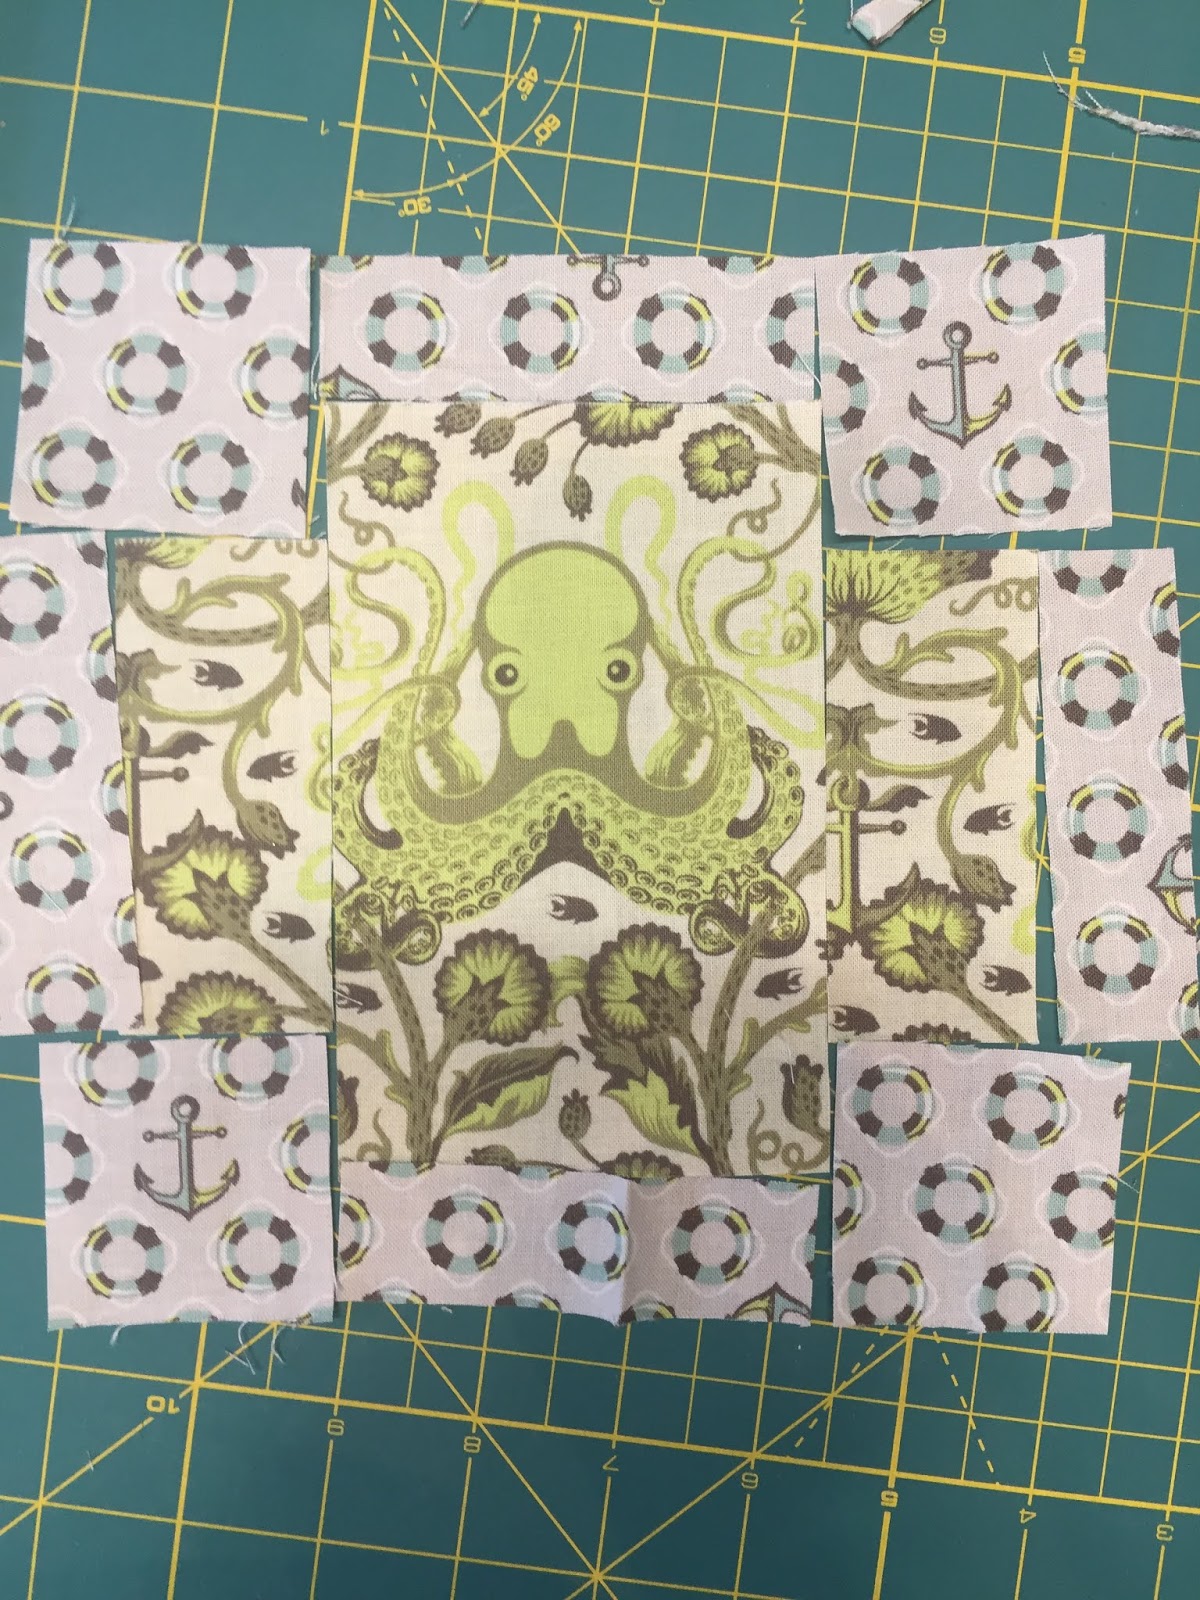
My latest project:  100 Modern Block:  Tula Pink's City Sampler


Tuesday, September 18, 2018

Quilt Swaps with Friends

12" block raffle....I won the blocks!
   As I have immersed myself further and further into the quilting world, I have met so many great people and made some wonderful friends along the way.  So often, when we are simply a member of a quilt guild, we end up just filling a spot at a meeting but never really getting to know anyone around us more than just by name.  Two great ways to make friends and get to know people are through small groups and attending retreats. 
  One of the activities that I have found to be most enjoyable has been arranging and participating in various types of swaps with quilting friends, and with those who have become friends.  I thought it would be fun to share some of those swaps and ideas with you all.
  The first time I ever went to a quilt retreat, I was pretty nervous.  I didn't know the ladies I was traveling with all that well.  In fact, I booked my own room because I was so nervous about staying with women I didn't know all that well.  I shouldn't have worried!  That retreat was so much fun!  Every chance I get, if I can scrape together the funds, I try to go to retreats!  I love them!  
Teal and Lavender exchange
   My first year at this particular retreat, we did a 10" square exchange.  Each person that wanted to play brought 40 10" squares in their designated color. Then, we each got one square of everyone else's squares. The goal was to make something with the squares and bring it to retreat the next year for Show and Tell.  Over the years, we have exchanged: yellow and black, teal and lavender, lime and navy, and bright polka dots.  Each time, I have tried to make a quilt for the next year, and I love them all! 
  Another fun thing that I have done with my quilting friends is a yearly block exchange. I pulled 12 of my friends together, and we meet once a year.  The first year, we exchanged 2" finished half square triangles out of a palette of Edyta Sitar, Kim Diehl, Kansas Troubles, or Civil War fabrics.  I used Edyta Sitar's book Friendship Triangles as the inspiration.  Everyone made whatever they wanted from their triangles.
  Over the next few years we have done red and white blocks in three sizes 6", 9" and 12".  Each person made one each of the three sizes for everyone else.  We also did an exchange using the Farmgirl Vintage book.  We put all the names of the blocks in a hat, drew 4 each, and made enough for everyone!  Believe me, 12 each of those 6" blocks took awhile to make!  It was all worth it when we got together and exchanged and magically had 48 different blocks.  This year we are using blue/tan 12" blocks.  It seems like 12 months is a long time to get your blocks made, but you wouldn't believe how many of us wait until the last minute!
  Another great idea that has come out of retreat is raffle blocks (this is where you bring a block or two in the designated colors and you get your name in the drawing to win them.  I won the blocks the year that we used 1930's reproductions!)  We have also played strip poker with fabric strips.  I DIDN'T win the orange and gray, but I loved them so much that I collected my own and made a quilt for my bed:)  We have also done some block exchanges within the retreat group.  One year, we did 4 1/2" finished pink and brown reproduction churn dash blocks.  The next year was tiny Ohio Stars.  The last time was house blocks in either 6" x 6" or 6" x 12".  It was up to us to figure out how to set all these wonderful blocks.
  All these blocks and activities have been so much fun.  The best part has been getting to know so many other quilters who share my passion for fabric and the beautiful things we can make with it!

Edyta Sitar's triangles exchange

Orange and Gray Strip Poker

Lime and Navy 10" square exchange

Red and White block exchange

Farmgirl Vintage block exchange

Wednesday, July 4, 2018

It's Wedding Season!

<a href="https://www.bloglovin.com/blog/6553897/?claim=pvjurakaxjz">Follow my blog with Bloglovin</a>


It's that time of year.  Nothing says "wedding quilt" like a Double Wedding Ring.  I have had the privilege over the years to work on some very beautiful quilts.  When summer wedding season rolls around, I almost always end up with at least one Double Wedding Ring, and more often these days a close variation (but so much faster and easier to make) the Metro Rings by Sew Kind of Wonderful.  These quilts are always so pretty and such fun to work on.
  So, what makes a successful wedding ring quilt?  
The key is CONTRAST!  Color is irrelevant. The only thing that really matters is that there is plenty of contrast between the background and every single fabric in the rings of the quilt.  If that all important contrast is not there, the rings "flash" in and out, and the overall desired effect is less striking that it should be.
  The pictures I am sharing today are from a simple, traditional, scrappy ring quilt.  This quilt was perfectly pieced, and a joy to work on.  I can only imagine that among all the scraps in this quilt were some pieces that had sentimental value to the grandma who made it and to the lucky granddaughter who was to receive it at her wedding this past June. 

 The Sew Kind of Wonderful pattern Metro Rings is a much simpler way to achieve the look of a double wedding ring.  This golden version that I quilted for a customer for her son's wedding is a gorgeous interpretation of that pattern.  Using the Quick Curves Ruler, a jelly roll, and this pattern, a lap size quilt can easily be put together in a week or two.  I teach classes on this technique, and while it is not necessarily a beginner pattern, with guidance it can be done by a confident beginner.  There are youtube videos to walk you through the process, too.
  Again, as we look at this Metro Rings quilt, notice the contrast.  The maker had some concerns that some of her fabrics were too light.  She even considered taking it apart and putting in something different in those spots!  Yikes!  I assured her that where the contrast was just a little bit light, I could use quilting to make sure that the eye did not get lost This quilt turned out so lovely!  I know that the young couple that received it for their wedding gift will cherish it.

Sunday, May 20, 2018

Preparing Your Quilt for the Longarm Quilter

Farmgirl Vintage quilt minus borders.
  Your quilt top is pieced.  Now what?
Have you ever wondered what you should do before you send your quilt out to be longarmed by a professional?  Each longarm quilter has their own preferences, but there are some guidelines that I can give you to follow that should be helpful.
  I have been a professional longarm quilter for 9 years, and, believe me, I think after 1000 quilts, I have pretty much seen it all.  I could go on for quite some time on what NOT to do, but, I will focus on the positive :)
  Here's a good list to follow:
1.  Trim all strings on the back side of the quilt.  This is especially important if you have used a light background where dark string will show through on the top when it is quilted!
2.  Make sure that you have added your borders properly and that your quilt top is as square and as flat as possible!  Yes, some things will "quilt out" and No...some things will not!
3.  If you have piano keys, small piecing to the edge, or loose seams at the edge, do a stay stitch all the way around the quilt top to stabilize and keep those seams tight when it is placed on the frame. This brings me to another tip:  Use a 2.0 or smaller stitch length!  So many times, I see seams that have used a 2.5 (standard default setting on many machines) where the seams are pulling apart or there is thread showing in the seams.  This is not good because those seams may pop open the first time the quilt is washed.  Also, if you plan to take the quilt to a fair, the judges will downgrade you if they can see thread showing in your seams.
4.  Your backing should be 5-6 inches bigger on all four sides to account for rolling and clamping it into the frame.
5.  You backing needs to be perfectly square and flat.  If it is pieced, this is absolutely necessary.  Once the backing is loaded and in the frame, I cannot manipulate or change what is going on in the back of the quilt.  Pleating will occur if it is not flat and square.  For this reason, (and because it is cheaper) wide backings are a great choice.
6.  If you do seam your backings, the seams should be planned so that they run parallel to the bars on the longarm.  Vertical seams are much more likely to pucker or create problems that horizontal seams.
7.  Remove selvedges.  The weave in the selvedges is tighter and different from the rest of the fabric.  If you do not remove selvedges, the area near them may pucker when the quilt is washed.
8.  Batting should be slightly smaller than the backing, but still 4-5" larger on all four sides than the top.
9.  If all the fabrics in your top have been pre-washed, then your backings should also be pre-washed.
10.  Finally, press the top and the backing neatly and hang on a hanger that you do not want returned!

  If you follow these guidelines, your quilt will be ready for the longarm quilter to create a beautiful and trouble-free end result.

Tuesday, April 3, 2018

Quilting and Social Media


  Are you overwhelmed with the amount of social media available to us?  As quilters, there are so many opportunities to play on social media that we might never get any actual quilting done if we spent all of our time on the internet! Search "Social Media for Quilters" on Google, and you will literally come up with 8 1/2 MILLION results!  What's a quilter to do?  I am going to try to give you a few pointers on how I use social media, and, hopefully, you will find it helpful :)
If you want to follow me, just search bar and of the following:  Lone Tree Designs, Sewing with Sandi, Quilters Cottage.
                                                             
  I use predominantly three social media outlets on a daily basis.  The first is Facebook.  Not only do I have a personal account for family and friends, but I also have a business account for my longarming business Lone Tree Designs, a sewing group called Sewing with Sandi which has members from around the world (screened applicants must answer a few questions and I check out their personal page to see if they are actually quilters before I accept them into the group), and I manage the business page for my mom's quilt shop in Kearney, NE Quilters Cottage.  Each morning, I start my day with a cup of coffee and my laptop.  I check each of my pages, make any updates that I want to make, and read all the comments that have been made.  In addition to my administration of these pages, I also follow many quilt related groups including specialty groups on Tula Pink fabrics, wool applique, specific quilt shops, and quilt "celebrities" like Bonnie Hunter and Angela Walters, plus countless others!  I also have allowed notifications on these groups, so I read through and see what's going on out there in quiltland!  This process usually takes me through my first cup of coffee.
  During my second cup, I check out Pinterest.  If  you have not yet discovered the fun of "electronic hoarding", I highly recommend it!  Pinterest allows me to create my own "bulletin boards" for all kinds of topics including:  quilty stuff, recipes, healthy living, gardening, fashion, and all kinds of things.  You can "follow" people on Pinterest just like you do on Facebook, and you can also follow specific boards belonging to other people.  I follow lots of longarm quilting boards, quilts, and funny memes.  I scroll through the home page, and I find pins that are from all the people and boards that I follow and pins that are suggested for me from Pinterest based on the things that I pin.  It is so visually and creatively stimulating to see all the ideas out there!  If, at any time, I want more information or to explore the topic in the pin, I just click on it and it takes me to that page.  I can also send pins that I think are interesting or helpful to my friends and family:)  I frequently "pin bomb" them early in the morning, and then later in the day when they have time, they can see what I sent.  You can follow me on Pinterest at:  Sandi Griepenstroh Lone Tree Designs.


  After my second cup of coffee is finished, I am DONE on the laptop for the morning.  This is to say, I drag myself away and head to the sewing room to start my day of longarm quilting for my customers or working on my own projects.  In the process of doing that, I utilize my third media choice, Instagram.  You can follow me on Instagram as RenaissanceSandi.  On Instagram, I post pictures of my work in progress for anyone who follows me and is interested in what I am working on.  I have my Instagram account set to download those photos and hashtags to my Lone Tree Designs account on Facebook so that anyone who doesn't use Instagram can also see my work on my business account.
  So, that's pretty much a summary of what happens during my days as I work from home and how I use social media.  However,  after my quilting day ends, I once again grab my laptop and go to Facebook, Pinterest, and if I have time I will check out some blogs.  If you are reading this, you have discovered blogging!  It is also a way that we could spend entire days just staring at a computer screen rather than getting anything else done!  There are so many interesting, informative, and helpful blogs out there on quilting.  I encourage you, in your spare time, to scroll through my "Blogs I Read" section on my blog for some of my favorites!
  My final word on this topic is that I haven't even scratched the surface!  I have Twitter, but find it to be more of a time waster than it is worth.  I get emailed notifications for just a couple of my favorite blogs, including Quilting is My Therapy, Stash Bandit, and 50 is Not Old (a fashion blog).  I choose just these few because I don't want to spend hours sorting through emails every day.  Email is a whole other topic, so I will save that for another time!  Enjoy your social media opportunities, but remember all that information is there to INSPIRE us to ACTION!


Wednesday, March 7, 2018

Preparations: Using the Stash


  Quilters have "a stash."  That term may have many meanings, but for most it refers to the fabrics in the quilter's possession that are not earmarked for a specific project.
  Now, the size of a quilter's stash varies tremendously!  Some have very little (they claim that they don't have a stash, but let's face it...that's just too hard to believe!).  Some have a stash so massive that they could literally open a small quilt shop!  Most are somewhere in the middle with their stash amount.  For years, I didn't have much of a stash (two small Rubbermaid containers maximum).  I just didn't see the point.  If I wanted to start a new project, I went to the store, bought what I needed, and made that project.  It wasn't until I began doing more scrap-type quilting that I started to see the value of collecting a stash.
  Most recently, I dug through my stash to find fabrics for a new "sew along" on my Facebook group.  My Sewing with Sandi Facebook group is something I started in order to connect with other quilters and to encourage the art of quilting.  Through sew alongs, tips, sharing works in progress, and encouraging participation in activities like mystery quilts, I hope to provide a forum for sharing our work and encouraging one another.    
  Before I begin any project these days, I start by going first to my stash.  After I have chosen a pattern, I go to the stash and start pulling fabrics that I think will work for that particular pattern.  I have found that it really is the only way to actually use what I have.  Once I have pulled everything I think I could use for the pattern, I measure it all out and see where I am at and if I need to buy anything more to have what I need.  I find that I often need to buy just background, borders, and maybe a couple of pieces to have what I need.  This method allows me to be creative with color and to modify the pattern to fit what I have on hand.  For example, my recent Bonnie Hunter mystery quilt, On Ringo Lake, became teal, brown, and mauve rather than aqua, brown, and coral.  I didn't have those exact colors that Bonnie suggested in my stash...but I had colors that were close, and they worked!  I was glad to use up that yardage from my stash.
  If you have a stash, and you want to actually use it, I encourage you to pick a pattern you love first, then go to the stash and pull anything that might work.  You can narrow your choices later.  Sometimes, you have to decide who plays well together!  It doesn't work well for me to go to the stash first and pick out fabrics that I want to use.  I have found that it is nearly impossible to find a pattern based on the pulled fabrics.  It's much easier to pull fabrics with a pattern already in mind.
  Finally, don't be afraid to "scrap it up" in order to use that stash.  Do you need 2 yards of dark purple?  It doesn't have to be 2 yards of the exact same fabric!  All you need is a total of two yards that "READS" dark purple.  Quilts become so much more interesting when the colors used are very similar but not exact.  From a distance, the colors may look like the same fabric, but when you get up close, you are delighted to find a variety. Super Fun!  I encourage you to try it :)


Wednesday, January 24, 2018

Quilt Design: Old School Style

A young couple with the baby quilt I designed
for them in their nursery colors.
   I am not a super creative person.  When it comes to quilting art, I am pretty good at taking someone else's creativity and "tweaking" it just a bit to make it my own.  I have a hard time following a pattern as written, mainly because I don't want my quilt to be exactly like anyone else's.  For this same reason, I rarely buy a kit, and if I do, I always make some changes by adding my own fabric or changing up the pattern.  I want my quilts to be "my" quilts, not a replica of someone else's quilt.
  One way to insure that a quilt is my own unique creation is to design my own pattern.  Early on in my quilting career, my mom taught me to take a piece of graph paper, use the squares on it for sizing, and draw up a quilt pattern.  After it was drawn up, she taught me how to figure the math so that I would know exactly what I needed to buy to make the quilt!  How fun!
                                                                                          
Exchange blocks on the design wall for creative inspiration.

A quilt I designed for blocks from another
block exchange.
I have used this skill many times over the past 25 or so years to design blocks and quilts for the annual NIFS Shop Hop here in Nebraska for my mom's quilt shop in Kearney, NE. My block design was used for the AMB solids state quilt that went to Houston.  Some of my easy patterns have been published in a NE farm journal, and I have made a few patterns to sell.    The baby quilt on this page was designed originally for Shop Hop, and I have found that it can be used for all kinds of fast, fun quilts.  I made a modern one out of solids.  I made a Husker one for one of my husband's wrestlers who was in the hospital, and it works great for a baby quilt!
  The really great part about this baby quilt is that, because I designed it, I know there is not another like it anywhere.  It's a special gift!
  Another situation that sends me to my graph paper is designing for block exchange quilts.  Sure, I could find all kinds of patterns that would allow me to use my blocks, if they were all the same size.  But, it is a lot of fun to make up my own pattern.  The red and white blocks are a combination of 6", 9", and 12"...not an easy pattern to find.  I saw a quilt on Pinterest that inspired me to design a quilt for these blocks.  I will have plenty of white space to show off my quilting!  
  The quilt pattern on graph paper is one that I designed this week for a set of blocks that I won't be receiving until next January.  I knew the blocks would all be 12".  I also knew that I wanted to use flying geese in my setting.  I first decided on a size for my quilt.  Then, I drew my 12" blocks with 4" in between to allow for my flying geese.  As I was designing, I started to think about how I could place the geese in an unexpected and creative way.  I decided that they should follow each other all around the quilt.  With my quilt designed, I did the math, figured out how much fabric it would take for my flying geese and my lattice, and purchased what I needed.  Now, all I have to do is make roughly 250 flying geese before next January!  When the blocks are exchanged, I will have my geese and my design ready to go.
  There are computer programs out there to help you design quilts.  You can even plug in your exact fabric choices to see how it looks and the program will figure the math for you to tell you how much yardage to buy.  I have one of those programs, and have used it.  I prefer the graph paper.  It may be "old school" but there is just something I love about drawing it out, erasing, and drawing it again.  I like using my imagination to think about what it will look like with different fabrics in different places.  I think it's good for my mind to have to figure out the math for myself.  Don't get me wrong.  I love my computer and all the great things it can do for me, but when it comes to quilt design, I will continue to design "old school"!

Tuesday, January 9, 2018

Discovering Bonnie, Discovering Scraps


Another year, another fabulous Bonnie Hunter mystery quilt!  Believe it or not, just three short years ago, I really didn't even know who Bonnie Hunter was!  Well, that's not quite accurate.  I had seen her scrap-busting block designs in magazines, but, since I had never been a fan of scrap quilts, I glanced over the pattern, thought, "that might be cute, if it wasn't so scrappy" and moved on to the next quilt.  Boy was I missing out!  I had no idea how much fun making scrappy quilts could be! 
 
  Let me explain.  I learned to quilt back in 1991.  I started the way some quilters start, with a beginning quilting class at a local quilt shop.  Our assignment each week was a block that used a different technique, and at the end of the class we had sampler.  We began with choosing fabrics.  I had no stash.  I didn't know what a stash was.  I went through the shop, chose a white on white for the background, a mauve, a country blue, and a dusty purple.  When that quilt was finished, I did not like it!  I sold it to my aunt for my cousin for her birthday, because my aunt was sure she would love it!  So, enter the next 25 years of my quilting journey.  Very few quilts were made because I was working full time and raising two kids.  Finally, in 2007, I quit teaching, my kids were mostly grown, and I had time to pursue quilting.  I picked up where I had left off.  When I wanted to make a quilt, I chose a pattern, bought the exact right amount of fabrics, and made the quilt.  There was very little fabric left over.  I didn't care.  I couldn't imagine what I would do with scraps!  In fact, if I did accumulate more than one container of leftover fabrics, I donated them.  Why would I need scraps???

  Enter, new friends.  Guess who they loved?  Bonnie Hunter of @quiltville_bonnie.  They were lucky enough to get into a quilt retreat in Sioux City with Bonnie Hunter, and they invited me!  I didn't know much about Bonnie, so I googled her, bought a couple of her books, and began my journey into using scraps.  That retreat was so much fun!  Bonnie was a wonderful teacher.  She is a giving, open, humorous woman.  I thoroughly enjoyed every minute of her trunk show and the two days of classes with her.  I also began to notice that, unlike me, the other ladies were using fabrics of all kinds in their quilts.  My fabrics were yardage that I bought for the class.  The other quilts were interesting, while mine seemed a bit lackluster.  Hmmmm....I was learning something about using fabrics of similar color and value in order to add interest to my quilts!

  The next year was the year Allietare came out.  I wasn't sure.  I didn't have scraps.  I saved the patterns but didn't make the quilt.  When the reveal happened, I was so sorry that I hadn't made the quilt!  So, when En Provence began, I was ready!  I had slowly accumulated more of a stash and more scraps.  I quickly realized that I don't buy enough lights for my stash (a problem I have since corrected!).  I followed along, and made the half size.  My quilt turned out beautifully!

  This year, Bonnie has treated us to On Ringo Lake.  When the colors came out, I loved them.  But, I determined to use as much fabric from my stash as possible.  I wanted to use my scraps.  I wanted to do what Bonnie does and create from the discarded and unused pieces in my containers.  So, I switched the salmon to pink because that's what I had.  I did use a line of fabric that I had in my stash with lots of yardage, so it isn't as scrappy as it could have been.  I discovered that I could pull browns and pinks from my bins and mix them in with the yardage that I already had.   That discovery is a long way from my old formula of one single fabric for each element in the block...and, for me, that is a great discovery!

http://quiltville.blogspot.ca/2018/01/mystery-monday-link-up-part-6-7-8-9.html 


Wednesday, January 3, 2018

Starting the New Year off Right

  2018.  It's a new year.  Where do we go from here?  Something about the change of the calendar from December to January causes many of us to have a renewed sense of purpose.  We feel ready to start over: ready to set goals, and confident that we can achieve those goals.  
  So, as a quilter, how do we go about setting and achieving those goals?  I do tend to get quite a bit done each year, and I have a few small suggestions of things that I like to do to get going in the new year.

1.  Straighten up your space!  Lots of people can work in chaos.  I am not one of those people.  Even if you are one of those people, your sewing area can be more functional if it is at least organized so that you can find whatever you need to have to work on your projects.  Nothing is more frustrating, or annoying, than looking for a tool, ruler, fabric, pattern, etc. and not being able to find it!  "I know I have that...somewhere."  is a sad statement.  Inevitably, if you give up looking and buy another...you will find it!  Don't put yourself through it!  "A place for everything, and everything in its place" is a well known and oft used phrase for good reason!  

2.  Focus your attention!  If you are like me, you have A LOT of unfinished and unstarted projects.  It can really be overwhelming sometimes!  A few years ago, a friend started a Facebook group for her quilting friends, and I was blessed to be included.  One of the fun things we do in that group is pick 12 projects for the year, label them 1-12, and each month someone draws a number.  That number is your focus for that month.  I started out that first year picking my OLDEST projects.  I wanted to clear out some of those things that had been sitting around a while.  It was amazing how much I got done that year, and I've never looked back!  Each January, I choose projects to focus on for the year.  Now, I just label them by month and don't use the number system because I am involved in several groups that do this.  It got too confusing for me to keep track of which number was for which group!  I have included a picture of my projects list for the first half of 2018 so you can see what I mean.

3.  Join a group that encourages you!  Like I said, my friend Anna's group was really my first experience with social media in relation to my quilting.  I found it was so much fun to see what others were working on and to be able to share my work with others.  I know for a fact that I would not have completed nearly as many projects without the encouragement and interaction from that group of ladies!  Last summer, I decided to start my own group.  My group is called Sewing with Sandi and was started as a way for me to interact with even more quilters from around the world.  It is an open group, but in order to join, you must be a quilter with a Facebook page that actually has evidence that you do quilt.  You must also answer a couple of questions in order to be approved.  Search for quilting groups on Facebook, and you will find all kinds of groups from wool applique to modern quilting.  Join several and see how much encouragement you find within the group.  You can always leave if you don't enjoy it.

4.  Remember that the goal is PROGRESS!  I don't put pressure on myself to FINISH everything on my list.  That would be stressful, and I do this for fun!  My goal is always just to work on that project (or those projects) during that month.  When the end of the month comes, if I am close to finishing I will carry over into the next month and finish.  If I am not close, I put it away and work on the next month.  The reason I have two or three listed each month is that I get bored easily, and, also, if I finish something, I can move on to the next thing on the list.  Try to make some progress each week on your chosen goal.  It makes a huge difference!  Last year, I simply wrote Bonnie Hunter down in three or four of the months.  I have several of her quilts in progress, and when her name came up, I worked on one of those quilts.  I actually finished two of them last year.  This year, I hope to finish at least two more of hers before I take class in October with her!  My point is this:  if you have something you really want or need to finish...write it down a couple of times.  Nothing says you have to have exactly 12 items or that you have to finish within one month.  Some projects are bigger than others.

  Like I said, I do finish a lot of projects each year.  These four items help me to do that.  I hope they help you, too.  Happy quilting, and I'd love for you to join Sewing with Sandi!